Vegan food can be delicious! What makes me angry is when vegan food is bland, flavorless, simple and just plain BAD! Learning to prepare delicious, fresh, and fast, vegan meals can be simple and fun. Follow me as I explore new techniques, inquire what's hot in the vegan culinary landscape and share my discoveries with you.
So grab you kitchen knife, and apron and bring your appetite and lets get cooking!
Sad, but true, I've been cooking up a proverbial storm. Due to work, family, and my continuing study of Japanese, my time for sitting in front of the old computer has been, lets just say, severely limited. I have although, been following quite a few people via Instagram, twitter and other social media pages for inspiration, and in some cases just plain nausea.
My pursuit of GOOD vegan food is never ending. What amazes me, more often than not, is what passes for GOOD food. Why? Why oh why have my eyes and taste buds been assaulted so many times over the past few months? In the age of the Internet, people, [and I don't remove myself from this equation] are privy to speak their mind and showcase their "talents". There is no harm in that, none at all. What frost my muffin is when they ceremoniously pat them selves on the back and call it greatness. I'm the first to post a picture of a great looking dish, but what I wont do is post a recipe until I've tested it and had others test it as well.
When writing a recipe, savory especially, the average at home cook, can bring flavors together with the best of them, but her lies the rub. to translate your vision so others may duplicate it is often more difficult than its made out to be. I read cookbooks all the time, even published authors have flubbed on a few of the directions. How many times have you read a recipe, and realized halfway through, an ingredient which is listed in the directions is NOT listed in the ingredients. Or better yet, an entire method or procedure is left out. The best is one in which the author assumes you know what they are talking about and doesn't either show, or describe the technique in detail. [raising my hand] I know I've done it myself, I admit it, but its a lesson learned.
I stalk the blogs, the post, and offer my kind words as a suggestions to help my fellow recipe developers. "Hey check out this technique!....Maybe try this ingredient instead, its cheaper and more readily available" But alas, my kind words are smacked with ridicule and hatred.
I simply ask, no I implore my fellow blogger's. Test your recipes before you post, your readers will thank you!
[putting my soapbox away and hanging my head in shame]
Lent is the time of year when fish on Fridays in my house is law. Well as the lone vegan in the house, and head cook and bottle washer, I have the wonderful duty of coming up with meat alternatives. As you can see, I'm not a big fan of fish. My husband, the carnivore is. So I decided to come up with a compromise for our Friday night meal. His love of fish tacos gave me the inspiration and it just took off from there.
It was trial and error to say the least and we found that bold flavors and good quality beer for the batter do the best.
We wanted our mushrooms to be light and airy, not like the bar food variety that you find at TG Mc Fridays. (so to speak). A cross between a beer batter and a tempura batter. The batter was the easiest part in this journey. It was imparting that bold flavor that threw us for a loop.
Spicy was the word de jour and we wanted it to have a Baja feel. Everything from chipotle to guajillo chiles were used. Even habaneros made the list. But it was the smokey and sultry chipotle which made the grade. Imparting just a bit more flavor, was marinating as well. The mushroom just soaks up the flavors and it leaves it really juicy as well.
Whats fried food with out a sauce or a dip. What better choice for our spicy tidbits, than avocado cream. Avocados, cilantro, green onion, garlic, lime juice, tofu sour cream and a touch of diced green chilies (or roasted poblanos) and it was good to go!
While researching just what goes best with a Baja style fish taco, I found that cabbage slaw was the side of choice.
Our victims (I mean taste testers) really enjoyed the flavor of the mushrooms and the slaw together and actually said that they could do without the tortilla. Go figure. The avocado cream was a hit. That being said the head carnivore of our house was absolutely floored at how delicious and satisfying our Baja Oyster Mushrooms were. I'm pleased to say its been put on the family favs list for good!!
Oyster Mushroom Tacos
serves 4
8 small corn tortillas
½-1 lb of oyster mushrooms
1 – 2 tbsp vegetable oil plus more for frying
½ cup corn starch
½ cup rice flour
½ cup all purpose flour for dusting
mushrooms
1 tsp baking powder
¾ tsp southwest seasoning*
2/3 cup club soda [non alcoholic version] or ale/beer
Wash and thoroughly dry the mushrooms and set aside. In a large skillet add enough oil to allow
mushrooms to be fried [about 1 ½ inches deep].
In a mixing bowl stir together corn starch, flour, baking powder, and
seasoning. Add club soda and whisk until the batter is smooth. Toss mushrooms in remaining flour. In small batches dip flour dusted mushrooms
in batter and fry until golden brown turning often. Drain on a wire rack and sprinkle lightly
with salt. Continue to fry until all the
mushrooms have been used. Set aside and keep warm in a low oven.
*Southwest Seasoning
Recipe (you can use this seasoning to spice up all your
dishes)
2 tbsp chili powder
2 tbsp paprika
1 tbsp coriander [ground]
1 tbsp garlic powder [not granulated]
1 tbsp kosher salt
2 tsp cumin
1 tsp cayenne pepper
1 tsp crushed red pepper flake
1 tsp ground black pepper
1 tsp oregano
Blend until combined and place in an air tight container.
Avocado Crema
2 large ripe avocados
1/2 c vegan sour cream
1 finely chopped jalapeno or Serrano Chile pepper
1 clove minced garlic
2 tbsp chopped cilantro
3 tbsp fresh lime juice
¼ tsp cumin
Salt and pepper to taste
In a food processor, add avocado, sour cream, chile, garlic blending until smooth. Remove from processor and place in a small bowl. add cilantro, fresh lime juice cumin and season to taste with salt and pepper.
Chipotle Lime Cole Slaw
1/2 head of green cabbage shredded
1/4 head of red cabbage shredded
1/4 c shredded carrots
1/2 c vegan mayonnaise [vegannaise is my personal choice]
1/2 c vegan sour cream
2 limes zested and juiced
1 table spoon of canned chipotle peppers with adobo sauce or 1 tsp of dried chipotle pepper [you may add more if you prefer more spice]
1 tsp sugar or 2 tsp agave nectar
1/4 c chopped cilantro leaves
salt and pepper to taste
In a small bowl, whisk together mayonnaise, sour cream, lime juice, zest, chipotle, and sugar. In another bowl, toss together shredded cabbage and carrots. Pour dressing over cabbage and toss to coat. Finish with cilantro leaves and season with salt and pepper to taste. Refrigerate until ready to use.
Take it to the plate!
When your ready to serve warm 8 small corn tortillas in a dry non stick skillet. Place 3-4 medium sized fried oyster mushrooms in each and top with cole slaw and avocado crema. Serve with cilantro rice, black beans and plantains. Just a suggestions or course. These are good on their own!
I may live in the Midwest, but I'm a true southern girl at heart. Grits represent all that is southern. Every family has a special way to prepare them. Some like them thick and creamy others more like a thin porridge, but which every way you cook them, its a blank canvas for a myriad of flavors.
In my quest for unique vegan breakfast ideas, I came across the book "A Real American Breakfast". Written by award winning authors Cheryl Alters Jamison and Bill Jamison. In this 300+ page cookbook they travel the globe. But, its meat centric. So, whats a vegan chef to do? Turn it on its head of course.
I love grits. I could eat them every day for breakfast and never get tired of them. Some southern dishes which come to mind when I think of grits are often Creole in nature. This recipe is inspired by it and it shows. The flavors are bright, light and filling. The ingredients are simple. A its great way to start any morning. As a way to step away from meat analogs and replacements, you can leave out the tempeh. If you still have that desire for a little smokey flavor, smoke your own! This can be done at home using a stove top smoker.
Nassau Grits
1 small white onion chopped
1/3 c chopped green bell pepper
1/3 c chopped red bell pepper
1 clove garlic minced
1/2 c diced tempeh
4 tbsp water
1/8 tsp liquid smoke or hickory smoke powder
3 tbsp vegetable oil
1 tbsp braggs amino acid or soy sauce
2 large plum tomatoes seeded and chopped
fresh black pepper to taste
2 1/4 c water
1/2 c Quaker quick grits [you may use old fashioned grits or stone ground. Follow cooking directions on the package]
Tempeh
In a medium skillet, heat 3 tbsp oil. Over medium heat, begin to cook tempeh until slightly brown and crisp. Add 4 tbsp of water, soy, and hickory smoke powder/liquid smoke. Stir until most of the water has been absorbed. Add onion, bell peppers and garlic continue to cook until vegetables are tender, about 5 minutes. Add tomatoes and season to taste
Grits
Bring 2 1/4 c water to a bowl and quickly whisk in grits, stirring constantly until the mixture returns to a boil. Reduce to a very low simmer stirring occasionally until desired consistency is reached. Season with salt and pepper to taste.
Spoon grits into shallow bowls and top with tempeh mixture, serve immediately. For a good southern breakfast serve along side, home fries, vegan buttermilk biscuits and homemade strawberry jam.
Nothing says weekend breakfast like a yummy, gooey, sticky sweet cinnamon roll. I have fond memories of waking up to my dad pulling this gems out of the oven and slathering them with cream cheese frosting. Ah, but the days of butter and cream cheese for this vegan are long gone. So I thought, why not. It can't be that difficult. Honestly, it's not.
This is truly a labor of love, and can be spread out over a two day period. The key here is patience. Letting the yeast bloom, the scalded milk cool and incorporating the flour slowly.
When baking people often neglect a few key points. The measuring must be exact and the ingredients room temperature. Not only does this insure a great end product, but also guarantees ease in putting the ingredients together.
For my sweet roll creation I've gotten great results with a German recipe for Kuchen. It's a very forgiving dough with an excellent crumb. It's also versatile. I've made donuts, danish, event coffee cake with this very same dough. So, once you've mastered it, you're going to LOVE IT.
The recipe, as originally written suggests kneading this dough by hand. Well, if you want a good work out have at it. Personally, I'll take a kitchen aid any day of the week.
German Kuchen
1/4 oz (one package) or dry
yeast 1/4 c warm water (not to exceed 105 degrees) 1 3/4 cscalded milkunsweetened soy milk 1/2 c margarine 3/4 c vegan sugar 1 tsp sea salt (fine grain) zest of 1/2 lemon 6 c flour set aside 1/4 c for dusting and rolling 1 tbsp groundflaxseeds/flaxmeal+ 3 tbsp
warm water (mix for 2 minutes until well combined.)
Filling 3/4 c light brown sugar 2 tbsp cinnamon 1 tsp vanilla extract 1/2 stick vegan margarine Glaze 4 oz vegan cream cheese 1 c vegan powdered sugar 1/4 c vegan margarine 1/4 tsp vanilla extract For the dough:Dissolve the yeast into the warm waterand
set aside.In a medium sized sauce pan, bring soy milk to a quick
boil and remove andwhiskin, margarine, sugar, salt and lemon zest.When
milk is warm to the touch but not scalding hot (105 degrees) addflaxmealmixture.
Whisk into yeast and stir in enough flour to knead dough. Knead until smooth
and elastic. (If you are doing this in a kitchen aid stand mixer about 2-3
minutes. Be sure not to over knead the dough) Place the dough in a lightly
oiled bowl and cover tightly with plastic. Let rise until doubled in bulk. (For
better flavor place in refrigerator overnight to rise for 24 hour. For this
method remove 30 minutes before to bring to room temp before rolling) When you are ready to roll, try your hand at making it a 13 x 9 rectangle 1/4 inch thickness. I know it sounds difficult, but try your best. Once you find a shape you can call your own, brush lightly with 1/2 cup melted vegan margarine.
For the filling: In a small bowl whisk together all the ingredients and sprinkle over the top of melted margarine mixture
Along the long edge of the dough, begin to roll away from you. Go slowly to insure a tight seal, squeeze as you go. When your done, you are ready to slice! Here's the tricky part. You want equally sized slices. Spray a 13 x 9 inch pan lightly with oil. Place dough in pan sliced sides up, try to leave as little space between them as possible. Cover lightly with a damp kitchen towel in a warm place and let rise until doubled in volume 40-60 minutes. Time to bake! In a 375 degree oven, place pan on the middle rack. Bake until the tops are golden brown. [To be extra certain of doneness you can take a kitchen thermometer placed in the center of one of the rolls. It should reach a temperature of 180 degrees.] When rolls are done. removed them from the oven and let cool in the pan for 10-15 minutes.
For the glaze: Combine cream cheese, powdered sugar, margarine, and vanilla extract in a bowl and whisk until smooth and creamy. Spread glaze over warm rolls and serve immediately or at room temperature
When it comes to breakfast in a carnivores world, its just not breakfast without bacon, sausage or ham for that matter. In my world, bacon is a no no. Unfortunately in my former life, I was [gulp] a meat eater and I loved the crunch of bacon. Now a days, there are quite a few meat analogs to choose from which offer, well, the taste of bacon, sausage, and ham. But why buy when you can make your own!
The famous Millennium Restaurant in San Francisco California is known for its vegan fair. Most importantly, vegan brunch. Although I've never had a chance to visit the restaurant personally I have purchased the Millennium Cook Book. Chef Eric Tucker brings flavor profiles which boggle the mind. I've fallen in love with his simply toothsome tempeh sausage. In my house even my meat eating husband enjoys the flavor. The ingredients are easy to come by, quick to put together, and best of all, if you make double the recipe, they freeze wonderfully!
Millennium Tempeh Sausage
[I've added a few twist, turns and short cuts]
Serves 8
8 oz tempeh sausage [*poached and marinated cooled and grated]
1 russet potato, peeled, finely dices into 1/4 inch cubes, boiled until fork tender and drained
2 to 3 scallions, finely chopped
2 tbsp cornstarch
1 tsp salt
1 tsp dried sage
1 tsp dried fennel
1/2 tsp ground black pepper
1/8 tsp red pepper flake [optional]
2 tbsp canola oil
In a medium sized bowl combine all the above ingredients. Use your hands to ensure the mixture is well combined. Let this mixture chill 30 minutes to 24 hours. When ready, form the mixture into 1/2 inch thick patties. On a lightly oiled cookie sheet, place each patty and lightly brush with oil. In a 375 degree oven bake for 8-10 minutes until lightly brown, turning once. Sausages should be slightly firm to the touch. To reheat, crisp slightly and heat through in a lightly oiled skillet. 2-3 minutes per side and enjoy!
[*to poach, place tempeh brick in a marinade of 1/2 cup soy, 1 tsp paprika, 2 cloves crushed garlic, 1 tsp dried sage, 2 tsp thyme, 2 tsp maple syrup or brown sugar and 2 cups of water. Whisk ingredients together and pour into a sauce pan bring to a low simmer and place tempeh in liquid. Cover and simmer for 15 minutes. Let tempeh cool in liquid]
Now...We've got the sausage, but mother needs a little crunch. Bring on EGGPLANT BACON!
When making this delicious breakfast treat is quick simple, and a crunchy treat you will be eating way beyond breakfast.
So which eggplant works best. This is a question which I asked myself and researched through other vegan websites. Here are a few options
Chinese Eggplant
White Eggplant
Sicilian Eggplant Each eggplant imparts a different flavor on the end product. Sicilian eggplant tends to be a bit bitter, Chinese eggplant is a bit milder but still has a slight bite. My personal favorite is white eggplant. Not only does it taste good, creates a wonderful looking piece of "bacon"! Marinating is the key to this dish, so try to let it set as long as possible. If you are in a rush you can let it sit for as little as 30 minutes and you are ready to eat.
[this video shows how to use a mandolin correctly]
Eggplant Bacon 1-2 medium sized white eggplants or small purple eggplants sliced 1/4 inch thick
[using a mandolin is the easiest way to do this if you don't have one using a sharp knife will do as well]
2 tbsp brown sugar
2 tsp soy sauce
1 tsp liquid smoke
1 tsp granulated garlic
1 tsp paprika [you can also used smoked for a deeper flavor]
2 tbsp vegetable or canola oil [neutral flavored oil is the best]
1/4 cup water
Preheat oven to 350 degrees. Using a mandolin slice the eggplant [unpeeled] into 1/4 inch slices [as thin as 1/8 inch if you like. The thinner the eggplant the quicker it will cool]. Set eggplant in layers in a glass or plastic container which will allow it to lay flat. Whisk together remaining ingredients. Pour marinade over the eggplant. Be sure that all the pieces are well covered. Place plastic wrap directly on to the surface of the eggplant to ensure that the marinade is in constant contact with it. Refrigerate 30 min-24 hours. When ready, place a sheet of aluminum foil over a cookie sheet. Place eggplant in single layers making sure not to overlap any of the eggplant. Bake 20-35 minutes checking frequently turning at least once. Bacon should be crisp and brown. Cool at room temperature and store in an airtight container at room temperature. Now lets eat some breakfast!
Nothing is more southern than a biscuit. While visiting relatives in Nashville, my husband noticed most meals offer biscuits as a form of bread with everything; be it breakfast, lunch or dinner. As the child of southern born and raised parents, this was a culinary choice I was simply oblivious to. Breakfast wasn't breakfast with out a biscuit to push the accompanying goodies around on the plate.
According to Food Network Magazine, the chicken biscuit from "Sunrise Biscuit Kitchen" is one which should not be missed. The biscuits are described as being light as air, flaky as well as buttery.
The folks at SBK take it one step further which the addition of a crispy, breaded chicken breast. Described by Jane and Michael Stern of Road Food.com as a "luxurious pillow of expertly fried white meat chicken with a golden crust and inside moist enough to flavor the biscuit once that crust is severed." Hmmm....well the challenged has been made and I've come up with a lovely, simple and delicious version of this carnivore delight.
Golden Fried Portabello Mushroom
6-8 Medium sized cleaned portabello mushrooms
1/2 cup unbleached all purpose white flour
1 cup rice flour
1 cup corn starch
1/2 cup unsweetened unflavored soy milk or coconut milk
1/4 cup seltzer water
1 tsp paprika
1/2 tsp garlic powder
1/2 tsp black pepper
1 tsp kosher salt
1 tsp celery salt
1 qt neutral flavored oil for frying
Place oil in a larger heavy bottom pan [cast iron works best] and heat to 375 degrees. The oil should be at least 1/2 inch deep. If you do not have a thermometer, here is a good trick. When the oil begins to heat up, to check for the correct temperature, place the handle of a wooden spoon or chop stick in the center of the pan. If bubbles begin to form around it the oil is at the correct temperature.
In a large plastic bag place white flour and portabello mushrooms. Shake to coat the mushrooms completely and set aside.
In a non reactive mixing bowl, whisk together rice flour, corn starch and dry spices. Add the milk and seltzer until blended.
Dip the flour coated mushrooms in the batter and let excess batter drip back in the bowl. slowly lower the cutlets into the oil making sure to place them in the pan away from you, one by one. Fry in small batches to ensure a nice crisp coating. Mushrooms should be turned once during frying. Remove from the pan when golden brown and drain on a wire rack. Keep mushrooms warm in a low oven [120 degrees] until all the cutlets have been cooked.
Cornmeal Biscuits
Note: This recipe requires a digital scale to ensure accurate measurements. If a scale is not available use the attached recipe for cornmeal biscuits courtesy of food network
16 oz [1 lb] of unbleached all purpose flour
4 oz golden yellow cornmeal
1 tbsp kosher salt
1 oz sugar
1.25 oz of baking powder
7 oz of vegan margarine
13 oz of soy milk + 1 tbsp of white vinegar
In a larger bowl sift together all dry ingredients.
Using your fingers, mix the margarine into the flour until well incorporated. the mixture should look like this:
3. Whisk together the soy milk and vinegar until thick. Slowly add the mixture to the flour in a steady stream until a dough starts to form. Knead the mixture until smooth. Let the dough rest for 5 minutes.
4. Roll the dough out to a thickness of 1/4-1/2 inch. The thicker the dough is rolled out the higher the biscuit. Using a 1/2 inch biscuit or cookie cutter. Cut biscuits into rounds.
5. Place on a unlined cookie sheet. Biscuits may be touching or spread out on the sheet.
6. Bake in a 425 degree over [400 degree convection oven] for 16 minutes or until biscuits are golden brown. Remove from oven and let cool in pan. [for a lovely flavor and texture, brush biscuits with melted margarine once they are removed from the oven and then let them cool]
To make the sandwiches:
Split the biscuit in half; place the bottom on a plate. Top {optional top with vegan cheddar cheese slices, or other desired toppings} with fried mushrooms. For and added bonus drizzle agave nectar over the top of the chicken. Place biscuit top over mushrooms and serve.
January has been an exciting month. With the new year, I decided to turn over a new leaf and let go of my carb addiction. As a vegan, "we" tend to rely on carbohydrates for EVERYTHING! When in doubt carb it out. With that being said. It's been an interesting 30 days. I've had to really pull out all the stops and think hard on what to cook each and every night. Now, I have to preface this by saying I didn't stop eating ALL carbs, but I did relinquish my reliance on bread and pasta.
When you take a good long look at what you eat as a vegan, and what restaurants offer us, it relies heavily on breads, pastas and "cheese". I did take a few wrong turns and have a potato and a bowl of brown rice or two, but, in my defense those carbs are in their natural state and as wholesome as possible.
Breakfast, was a hard one. The meal alone, in my house, is usually pancakes, toast, or a sandwich in some form or another. With the wonderful group of fellow bloggers I found inspiration in all shapes forms and ethnic backgrounds. Rice and soy milk slightly heated with a touch of cinnamon, yes hot rice pudding is a wonderful breakfast. Or, quinoa, agave nectar, toasted walnuts, golden raisins and dried cranberries. HEAVEN. Tofu scramble was reinvented with left over tortilla chips, salsa rojo, chopped avocados and pickled jalapeno peppers, GOOD MORNING!
Lunch. Now, salads were my go to meal. Again, thinking out of the box, fried green plantain as bread, topped with refried black beans, red and green cabbage with a creamy avocado dressing and spicy jackfruit. Delish! Or how about Tempeh salad with sprouted raw crackers and bib lettuce. In my quest to replace bread I discovered so many different vehicles for lunch. Rice paper, tofu pouches, sprouted corn tortillas, lettuce, even thin sliced veggies.
Dinner. 30 days took us around the world in more ways than one. We toured the ring of fire, the far east, South America, even the continent of Africa. When my family gathers around the table, they never knew what they might get.
Over the next week, I'll be posting some of the recipes. As an homage I'll include links to those bloggers who inspired some of these dishes as well. So stay tuned fellow vegans!
This week I've been feverishly working on new recipes. Surfing the web, I've come across wonderful raw recipes which have been quite inspiring. Taking to the kitchen with my oven firmly shut, and my stove turned off. It's been a challenge. The recipes are still in the testing phase....but....
Here are a few ides being tested at the current moment.
Raw lemon bars
Raw granola
gluten free raw cookies
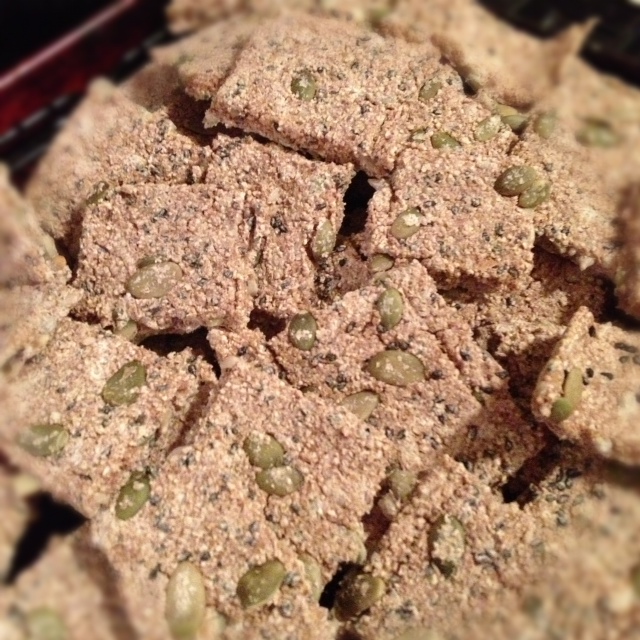
Raw crackers/bread
Raw coconut yogurt
All of these are in the testing phase, so they're not suitable for print. But...I'll wet your appetite with a little food porn.
Every week, I plan my menu. In my world, days are not simple and more often than not, stressed. I've had this goal, all week to travel around the globe via the dinner plate. Yesterdays menu should have been a vegan jibarito with a black bean burger. WRONG!! Things did not turn out as I'd planned. So, plan b.
I had all the ingredients I needed for the jibarito, but unfortunately I did not get green plantains, I got medium ripeness. Yes there is such a thing. When I fried them, they turned out to be a cross between a potato and a unripe banana. Not as delicious as it sounds. So what to do, what to do....a BOWL.
This dish was quick to put together, and the recipe may have a few more steps than you're use to, but it is as easy as they come.
Jibarito Bowl
1 cup white rice
1 3/4 cup water
1/4 chopped cilantro
1 lime zested and juiced
1 tbsp oil
salt to taste
1 can no salt or low sodium black beans
1 cup fresh or frozen corn [thaw corn completely before cooking]
1/4 cup chopped yellow onion
2 cloves garlic minced
3 green onions chopped
1/4 cup green and red peppers chopped
1 jalapeno pepper minced
1 tsp cumin
2 tbsp oil
salt and pepper to taste
2 medium green plantains sliced into 1 inch half moons
3 tbsp oil + more to fry plantains
1 small onion sliced into moons
2 cloves garlic minced
1 chipotle pepper
1/4 cup water
1/4 cup chopped green onion
2 tbsp chopped cilantro
2 tsp ground cumin
salt and pepper to taste
Directions:
To make rice-
In a small sauce pan, place oil and rice. Stir rice to coat with oil. Pour in water and season with salt [at this point taste your water. If the water taste good...so will your rice].
Bring water to a boil and reduce to a simmer. Cover with a tight fitting lid and continue to simmer for 15 minutes.
After 15 minutes remove rice from heat and keep the lid on for an additional 8 minutes.
Remove lid, stir in cilantro, lime zest, juice and additional seasoning if necessary [keep warm]
To make Cuban style corn-
In a medium size saute pan, heat oil. Add onions and saute until slightly golden. Add corn, peppers and continue to saute for 2-3 minutes
Add garlic and black beans. Continue to cook for an additional 2-3 minutes [besure beans are heated through completely. Take more time if you need to do so]
To finish, add cilantro, green onion, chipotle pepper and season with salt, pepper and cumin
To make plantains-
Fried plantains
In a heavy bottom pan [for me a cast iron skillet works best] heat oil until it reaches a temperature of 375 degrees [Chefs tip: if you don't have a cooking thermometer you can use a wooden chopstick! Place the chopstick in the center of the oil. If bubbles begin to appear as if frying your oil is hot enough]
In small batches, begin to cook the plantains until golden brown. Remove from the oil, and drain on a wire rack or paper towels. Keep warm in a low temperature oven. [275 degree oven is best]
Once all the plantains have been cooked. In a separate medium to large skillet heat 3 tbsp of oil.
Saute onions and garlic until fragrant. [once you can smell those onions and garlic your ready to move on]
Add your cooked plantains to the pan, chipotle pepper and olives plus 1/4-1/2 cup water [you may add more if necessary] stir, bring to a simmer and cover with a tight fitting lid for 2-3 minutes. [Chefs tip: test your plantains for doneness. Remove one from the pan. It should be soft much like a baked potato and not have a raw starchy taste. If the water has boiled away add more and continue to cook until done]
Remove lid, add cumin and finish with salt and pepper to taste. Garnish with green onions and cilantro
CHEFS BONUS!
For my over achievers out there. Here is a quick picked condiment. When you top off your jibarito bowl with this, it takes it to a whole different level.
Quick Pickle
1 carrot grated
1/2 red onion grated
1/2 cup sugar
1/2 cup white vinegar
1 tbsp salt [more to taste if needed]
1 tsp whole black pepper corn
In a small sauce pan, bring sugar, white vinegar, pepper and salt to a boil. Boil for 1 minute and remove from heat. Add onions and carrot and let steep for 15-20 minutes. Refrigerate until ready to serve
It's a standard in any chefs repertoire, the quiche. You can open the fridge, rummage through a few drawers and ta-da, you have the makings of a quiche. In our house, we've had it for every meal of the day. From breakfast to midnight snacks, both hot and cold. It's, dare I say it...a good meal!
Now in the world of the carnivore or vegetarian, eggs are the go to binder. Yes, I know my fellow vegans, I can hear the collective..."But I can use tofu", and this recipe is no different, I will be using tofu. The similarities to other quiches ends there.
For the entire month of January, I've decided to go gluten free, and, low carb [gosh I can't believe I just used that phrase]. Normally when I make quiche I use my standard 1-2-3 pie crust, which is not only flaky but sturdy to boot. In this recipe, I've decided to mix the crust into the quiche. I accomplish this by using besan flour [chickpea or garbanzo bean flour]. By adding the flour, you have a cross between a slice of warm bread and a quiche. Moist, flavorful, with a bit of toothsome bite.
Here I will provide you with a base recipe, think of it as a road map for your quiche journey. To the base recipe you can add the vegetables of your choice. One word of caution, par cooking the vegetables [2/3 doneness] and draining any excess water will help produce a product you will be proud to serve.
Vegan Collard Green Quiche
Serves 8-10
Pre-heat oven to 350 degrees
[base ingredients]
1 3/4 c besan [chickpea flour]
1 cup water
1 1/2 tsp baking powder
15 oz firm tofu [drained] ~not silken tofu
[collard green quiche ingredients]
1 cup medium chopped collard greens [you may substitute spinach or kale]
1/2 c diced red peppers
1/4 c chopped onion
2 cloves minced garlic
2 tbsp neutral flavored oil
1 c daiya cheddar cheese [vegan cheese of your choice]
2 tsp salt
1/4 tsp chili flake [optional]
Directions:
Wilted Greens
In a medium sized bowl whisk together flour, salt and baking soda. Add water and blend until smooth. Set aside
In a medium saute pan, heat oil. Saute onions until translucent. Add peppers and collard greens. Continue to cook until greens begin to wilt [shrink by half their size]. Add garlic and continue to cook until the greens have released most of there water. Season with salt and pepper to taste. Remove from pan, drain any liquid if necessary [you can do this by placing the greens in a small mesh strainer] and let cool to room temperature
Add cooled greens mixture to flour mixture to combine. Fold in cheddar cheese and chili flakes if you are using them.
Lightly oil a 9 inch pie tin. Pour mixture into tin and smooth with a off set spatula or the back of a wooden spoon. Be sure you quiche is level in the pan. This will ensure an even baked product.
Par-baked Quiche
Place on the center rack of a 350 degree oven and bake for 70-75 minutes or until a knife comes out clean when placed in the center of the quiche.
When done, remove from the oven and let cool for 5-10 minutes before cutting. This can be served hot or cold along side a mixed green salad or soup. We've even had it with roasted potatoes.
Breakfast in our home is always a rush. With two little ones to get out the door and a husband who's in a rush, grab and go can sometimes be the only option. In an effort to eat more whole foods, and to eat as healthy as possible, I began to experiment with granola bars. Easier said than done.
What started out as a simple quick grab and go breakfast item, turned into the "War of the Roses". We've been divided into two camps. Crunchy granola bars, and chewy granola bars. How do you keep everyone happy? Well, its a little bit of this, a little bit of that. Long story short, its a cross between a cookie and a granola bar. Crunchy on the outside and somewhat soft on the inside.
2 cups rolled oats
1 cup pecans, [you can use almost any nut of your choice] chopped
1 1/2 cup dried fruit [raisins, cranberries, apricots, you name it]
1 cup all purpose flour [or use spelt, whole wheat ]
1/2 tsp baking powder
1/4 tsp table salt
1/4 lb [1 stick] vegan margarine [earth balance or willow run are great options]
3/4 cup packed light brown sugar [you can make your own, by using vegan sugar and black strap molasses, combine 3/4 tbsp of molasses for every 3/4 cup of sugar]
1/4 light agave nectar
1 tbsp ground golden flax meal + 3 tablespoons warm water [this is the equivalent of 1 egg. This works much better than "egg replacer"
1 tsp vanilla extract [it here where you can really have fun. I've used coconut, peanut butter, almond, orange]
Directions:
Preheat your over to 350 degrees
I use a square muffin tin which has been lightly sprayed with a nonstick spray. If you don't want to use an oil spray lightly, oil the tins with a bit of margarine.
In one of two bowls, combine rolled oats, nuts, and dried fruit of your choice and set aside. In the second bowl, combine flour, salt and baking powder and set aside.
Now comes the fun part. If you have access to a stand mixer this is a great time to drag that puppy out. If not a hand held mixer will work just as well. Beat the vegan margarine, sugar and agave nectar until light and fluffy. Be sure to scrape down the sides of your bowl so you don't have any bits which are not combined. Add your flaxmeal mixture and extract and continue to beat until all the ingredients have been incorporated.
On to the rest of your ingredients. Slowly add the flour mixture to your butter mixture until combined. Don't forget to scrape that bowl!
You're half way home. Add your rolled oat mixture until it just comes together. At this point you can place your mixture in the fridge for a few minutes or you can take it right to the pan!
Using and ice cream scoop, if you have one. Drop leveled scoops into the muffin tins and tap down to make them even.
Place tin in your 350 degree oven and bake for 22-25 minutes or until the tops are a golden brown. I know you will want to just gobble them up as soon as they come out of the oven, but let them cool a bit. [10 minutes or so] Running a knife along the edges loosen the bars from the tin [continue to cool]. Once your bars are room temp free them from the pan and have at it!
These bars wont last long. Ours didn't last a week in our house. But if you do have the ability to keep them around, store them in an air tight container at room temperature.
The thought of vegan food for most meat eating individuals is heart wrenching. When I tell people I'm a vegan, most roll their eyes and ask..."So you just eat salad and tofu right?" Oh, ye of little knowledge of the vegan world. It's not as if meat eaters haven't been exposed to vegan food, heck even Oprah has praised it's benefits, but the joys of it end there.
The rock star chefs of the vegan world, are well, like the rock stars of the fitness world. [This is the world I currently reside in as a fitness instructor and personal trainer]. Those who work and live within the circle know who they are, but outside of realm, no one knows or cares about them. Many, are innovators of vegan culinary arts. Names like Isa Chandra Moskowitz, Chloe coscarelli, Tal Ronnen, Beverly Lynn Bennet and so many more have shed a new light onto vegan cuisine making them accessible to carnivores and herbivores alike.
Rock star chefs write cookbooks, and cookbooks are like dictionaries, you buy them with the preconceived notion you will use them but, truth be told, they sit on the shelf, collect dust only to be used when absolutely necessary.
So, how do you get beyond the cookbook collection, beyond the stigma of bad vegan food? Well, you've already taken a step in the right direction. Simple recipes, using obtainable ingredients, and techniques you can build on. That's it. Vegan food is more than grocery store veggie burgers and prepackaged meat analogs [truth be told, I LOVE some of the meat analogs...but I digress]. It goes beyond the ethic cop-outs of Indian, Mediterranean, or Asian cuisine. To be vegan, a TRUE vegan, you have to embrace the gifts mother natures has to offer and exploit them to their fullest potential.
Your mission...if you choose to accept it, is to take a moment...browse around the website...pick a recipe or two...cook..eat..and enjoy! You'll thank me later..or as I tell my fitness classes..."I promise you'll enjoy or I'll refund the price of admission!" [So...how much did you pay to get log onto this website?]
 My pursuit of GOOD vegan food is never ending. What amazes me, more often than not, is what passes for GOOD food. Why? Why oh why have my eyes and taste buds been assaulted so many times over the past few months? In the age of the Internet, people, [and I don't remove myself from this equation] are privy to speak their mind and showcase their "talents". There is no harm in that, none at all. What frost my muffin is when they ceremoniously pat them selves on the back and call it greatness. I'm the first to post a picture of a great looking dish, but what I wont do is post a recipe until I've tested it and had others test it as well.


.JPG)

.JPG)
.JPG)
.JPG)


.JPG)